Tuesday, October 23, 2012

End-Of-Season Misfit Cherry Tomato Paste

End-Of-Season Misfit Cherry Tomato Paste
Well, it's over. For us anyway. Tomato season is officially done. We plucked the last hangers-on off, and there won't be any more until next summer. Do you still have tomatoes where you live? Some years have found us picking them into November, but that was an exceptional year in a backyard that got oodles of sunlight. This was not such a year, and this is not such a yard. Alas.

Waste not... want not
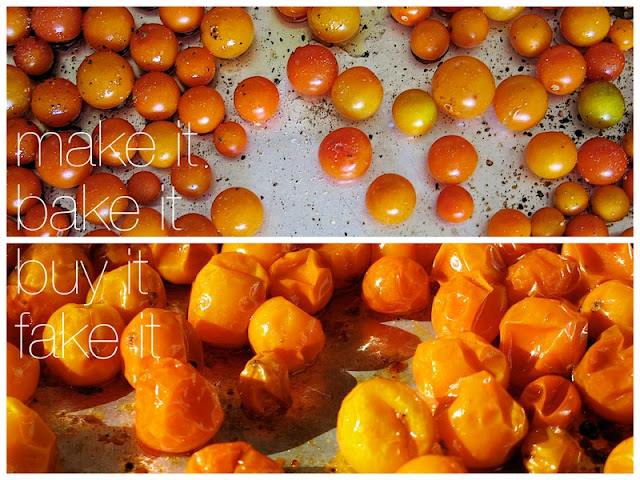
As you may have noticed by now, I hate to waste any bounty and am always looking for ways to make the most of what we have. These last-of-the-season cherry tomatoes were in all different states of being. Some were perfection, some on the green side, and a few so ripe they practically imploded on contact. There were also those that looked ripe but had taken so long to get color that they just didn't taste as good as they should have.

You can leave the skins on
I figured the best thing for this to-motley crew was to make a tomato paste. But with all the stuff I've got going on right now, I just didn't want to drag out the food mill. Did I really need to get rid of the skins? (That's another theme around here: I don't peel or skin fruits and vegetables unless I absolutely have to.)

It's not laziness, it's efficiency!
I'm all about saving unnecessary steps, time, and energy, with one condition... the end result can not be lacking in any way. In fact, the end result should be at least as good as the version that it's riffing. OK, so maybe it doesn't always happen that way, but that's what I shoot for. This golden tomato paste (from Sun Gold tomatoes) is the very essence of ripe homegrown tomatoes. It's like all of summer condensed down into a little jar (and it's going to taste grand this winter in stews and pasta sauces)!


The Lazy Girl's End-Of-Season Misfit Cherry Tomato Paste
There is a tinge of bitterness from the skins, but it can be tempered with a bit of sea salt and/or sugar. I'm betting though that when used in a hearty stew or ragout... it will won't be an issue.

Ingredients...

Cherry Tomatoes: enough to cover the bottom of a baking sheet in a single layer
Olive Oil
Salt & Black Pepper
Fresh Herbs: basil, oregano, or thyme, roughly chopped (Don't bother chopping the thyme, just strip the leaves from the stem.)
Sugar (Optional, and possibly not needed depending on the tomatoes of course)

Directions...
  1. Wash, stem, and dry the tomatoes. Fill the pans with a single layer of them. Turn the oven to 300°F.
  2. Drizzle a little olive oil over the tomatoes. Grab the baking sheet in two hands and shimmy the tomatoes back and forth in the oil. Then sprinkle some sea salt over the tomatoes, followed by the black pepper.
  3. Roast for two hours, rotating the tray(s) half-way through. If the tomatoes start to get too dark, push them around on the tray and turn your oven down a bit. If after two hours, they don't seem done (kissed with golden brown, squishy and collapsed), leave them in until they do.
  4. Take trays out of oven and let cool briefly, then transfer roasted tomatoes to the bowl of a food processor. You may have to process them in batches, but it will go fast. Pulse until skins are cut up quite small.
  5. Look at the texture: does it look dry-ish and too pasty? If so add a little more oil and pulse it in until it's more of a glossy-creamy consistency. Now taste it. Does it need more salt? More pepper? What about a touch of sugar? Always add in small increments. Keep tasting until you're happy with it.
  6. Toss any herbs you want to use (if any) into the food processor with the tomato paste and pulse briefly to distribute them throughout.
  7. You're done! Let it cool completely, then transfer to freezer containers, label, and freeze.
Notes: This yields anywhere from 1 to 2 cups of finished tomato paste. Freeze it in quantities that you are likely to use when cooking: half-pint canning jars, smaller plastic freezer-safe containers, even ice cube trays. 

More Notes: The first batch I made got some thyme added in at the end, and I used my stick blender. It took longer to get the skins broken up enough that way, but it's a good option if you don't have a food processor. The next two trays went into the food processor and had fresh chopped basil and oregano added.

Shine on, harvest moon!

Thursday, October 18, 2012

Simply Cilantro Salad Dressing

One of the last things I did before my second cilantro plant bolted, was to make a simple dressing with it. A simply delicious dressing. If you are one of the many people that don't like cilantro, you probably won't find this tasty in the least. The rest of us, who do like cilantro... will love it.

Simply Cilantro Salad Dressing
Adapted from: simplefoodhealthylife

1/3 cup olive oil
1/2 cup plain Greek yogurt
1 Tbsp lemon juice
2 garlic cloves
1 Tbsp white vinegar
1 bunch/handful cilantro
1/2 tsp ground pepper
sea salt to taste

Mix everything but the salt together in a food processor. Taste the dressing, then start adding the salt, a 1/4 tsp at a time, tasting as you go. When you're happy with it, transfer the dressing to a bottle or jar and store in the fridge. It should keep at least a couple of weeks.

Notes: We've been using this on lots more than just salads... tacos, quesadillas, even omelets and baked potatoes. It's great for a bright little touch of flavor almost anywhere.

Tuesday, October 16, 2012

Happy Kefir-versary!

Concord Grape Kefir Soda
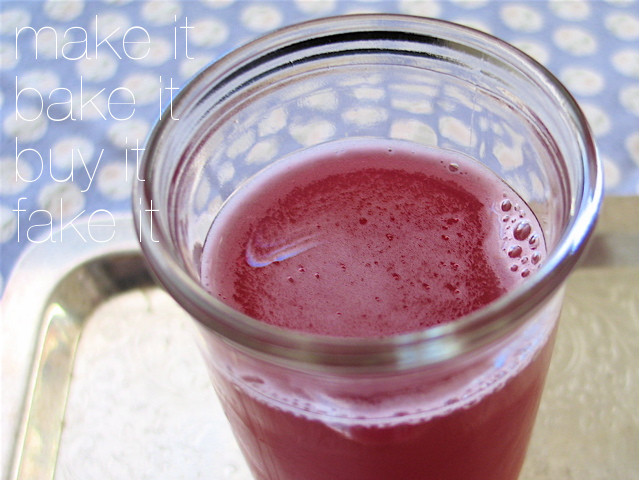
And just what ever happened to that half-gallon of murky Concord grape juice that I threw in the freezer last month? Well, part of it went into making some kefir soda. It so happened that we were out of store-bought juice and there was all that leftover grape juice just sitting there.

I introduced it to my water kefir and SHAZAM! As you can see in the photo, water kefir loves raw organic unfiltered unpasteurized fruit juice! Duh, right? Of course it does! Fizzy bubble-rific-ness. Delicious, free (yea!), and full of all kinds of health and happiness. Hubs calls our kefir sodas Fizzy Lifting Drinks, after his favorite boyhood film.

It's been just over a year since I started these kefir grains. We still drink kefir soda every single day and the little darlings seem to be going strong with no signs of stopping... except that one time when I left Hubs in charge of them... but enough said on that. They bounced back and were none the worse for the ordeal.

We've all settled into a nice routine and they're pretty forgiving if I'm late a day here or there. I still make the kefir soda as cheaply as possible, and I only make as much as we can consume before the next batch is ready. It works out really well... nice and predictable!

My secret to making great budget kefir soda (from juice), is this: Use the best juice you can find for the best price you can find it at.* It sounds obvious, and it sounds easy... but it isn't if you're trying to do this on a squeaky-tight budget. I tried a lot of different brands from a lot of different stores and read a whole lot of labels...

Wednesday, October 10, 2012

Farm Fresh Harvest Pasta Sauce

Just days before our trip, while I was in fact hip deep in Concord grapes, cherry tomatoes, and other fresh produce that wouldn't wait for our return, we stopped to chat with a neighbor while on a walk through the neighborhood....

This neighbor, who has a small farm, was busy that day harvesting everything she possibly could before they moved. They were being forced out, not by a giant food conglomerate, and not by the government policies that hobble small farms. No, it was the simple act of their rent being raised to the point where they could no longer afford to remain. It's a sweet little farm with a tidy little house to one side with contented cows, happy pigs, and chatty chickens wandering about. The kind of sweet little farm that could only exist because of the hard work and commitment of two conscientious and genuinely nice people.

She asked if we'd like some tomatoes
Well, we couldn't say no. Who can say no to homegrown tomatoes? We may have had a truckload of cherry tomatoes this summer, but it's a little hard to make a BLT with tomatoes the size of marbles. So we finished our walk and Hubby went back over with a bowl. What he returned with were the most glorious Roma tomatoes I'd ever seen. There were a couple of big heirloom beauties also, and an onion that left me speechless, it was so fat and healthy looking.

Friday, October 5, 2012

Concord Grape Jelly (and the errors of my ways)

The Garnet Gleam of Concord Grape Jelly
So.... I mentioned having a ton of grapes the other day. Well, it wasn't really a ton... it was 13 pounds. I exaggerated. I can't even say that it seemed like a ton of grapes. I've actually had hands-on experience with what an actual ton (or twenty) of grapes is like when Hubby and I help with the wine crush at our favorite winery each autumn.

Our harvest of Concord grapes was like a drop in the proverbial bucket (barrel?) compared to that. But since my backyard is a far cry from ever being called a vineyard and my kitchen is certainly no winery... those 13 lbs. still seemed like a whole awful lotta grapes.

Making the most of what we've been given
The vines came with the house, stealthily growing under the ivy on the back fence. And although we didn't plant them, pay them any attention, or even want them... there they were: fat, juicy, sweet, abundant, and free. They were a truly a gift to us, and I wasn't about to waste them.

Sunday, September 30, 2012

Capturing The Last Bites Of Summer

Peaches & Cream (with a little bourbon & brown sugar)

I had to go out of town recently and had a dilemma... what to do with all the fresh produce on the counter before I leave? There were tons of grapes, a whole lot of two different kinds of tomatoes, and 5 peaches. On our budget, this stuff is like gold. I had to make the best use of it that I could, and I only had a few days to do it. It wouldn't keep until I got back.

First up... the five peaches. A nice lady at church shared the last late fruit from her tree. They were lovely and fragrant. We could have just eaten them as is, but I wanted to do something a little more special with them. It's not every day that we get such beautiful ripe fruit and it will be a long time until peaches are in season again. Then I remembered seeing a recipe for peach ice cream that sounded kind of slightly spectacular...

Peach, Bourbon & Brown Sugar Ice Cream
adapted from Serious Eats

4-5 ripe peaches
2 cups heavy cream
3/4 cup light brown sugar
1 tsp molasses
1/4 cup brown rice syrup
1/2 tsp salt
2 Tbsp bourbon

Wash, dry, and cut the peaches into large chunks. Don't bother peeling them.

Blend the first five ingredients together in a blender or food processor until the peaches are completely pureed.

Transfer to a saucepan and bring to a simmer over medium heat, stirring often. Simmer for 5 minutes or until it starts to thicken. Take off heat and let cool to room temp.

Stir in the salt and the bourbon, then transfer the mixture into a bowl. Cover and refrigerate for 6-8 hours or overnight.

When it's fully chilled, process in an ice cream maker according to the manufacturer's directions. Transfer the soft ice cream to a freezer container and put in the freezer for at least 3 hours.

My Notes: If you have dark brown sugar, use it and omit the molasses. The bourbon is not a strong presence in the finished ice cream but I would be afraid to add more as it might interfere with the freezing. Still, I like that it's in there and just because it isn't a strong flavor doesn't mean it's not adding to the overall deliciousness. Definitely let this stuff sit in the freezer for a few days if you can... the brown sugar really comes forward at the finish if you do. Really nice ice cream. Sweet, subtle, perfume-y, earthy... yummy.  

All-in-all, a fitting finish to summer.
Coming up... my preserve-a-thon continues with concord grapes, two kinds of tomatoes, and much much more! How about you? Preserve anything lately?

Thursday, September 27, 2012

How Marriage Is Like A Toaster


5-Grain Sandwich Bread
(or... How we kept 4 toasters out of the local landfill)

Last year for our anniversary, our toaster died. For the fourth time. Or, should I say... for the last time.

I'd better start from the beginning. One year and one month after receiving our lovely big toaster as a wedding gift, it stopped toasting. It, of course, had a one-year warranty. Our newly-married budget would not allow for it's replacement in kind, so we would have to buy a cheap new one... or have it repaired.

Words That Start With "R"
What are the green 3-Rs again... Reduce, Reuse, and Recycle? What ever happened to Repair? Is it lumped under the Reuse heading? It needs to be its own "R". Twelve years ago, it looked like the honeymoon was over for our wedding-toaster when I realized that small appliance repair was apparently a lost or dying art. Too many years of people thinking that the fourth "R" stands for Replace. I found one repair shop though, and they told me on the phone that if they couldn't fix it there would be no charge. If they could fix it, $24.

Such A Deal
Well, the way I saw it, even a cheap toaster would cost us something in that neighborhood, so fixing it would be like buying that same $60 toaster at 60% off. We decided to go the repair-route. That repair lasted us 6 years before the toaster bit the dust again. Back to the shop, and another $24 fix job. So we've put a total of $48 into it (or by my calculations, bought a $60 toaster for 20% off).

Fast forward four years. Once again, kaput. The shop had moved, but was thankfully still in business. This time it was the circuit board. Our tally is now up to $72 for a $60 toaster. I looked over at Hubby on the way home, "You realize this was the last time?" He nodded in reply.

Requiem For A Toaster
When the oft-resuscitated toaster kicked the bucket last September, Hubs brought up the R-word: repair. I used a different R-word and reminded him of our toaster's history, the timeline, the math. He nodded again... remembering.

It Was Finally Time For A Replacement
Time now to research brands and models, features and reviews. Tedious stuff. But we take our toast seriously. And after living with that toaster for 12 years, we both had definite ideas about what we each wanted in a new one:
  1. I bake a lot of rustic round loaves of bread, and I prefer toasting whole slices. 
  2. Hubs has strong feelings about different manufacturers and their quality. 
  3. We both wanted something simple and basic. One that does what it does, and does it well.
The field of contenders was actually pretty small after we combined our needs and requirements.* Which toaster we ended up with, isn't important to this story. Toast is so subjective anyway. A real hot topic. I'll just say though that we found exactly what we wanted, it cost more than I'd hoped to spend, but then it's also been 12 years since we've shopped for a toaster. I really can't complain!

Happy Toaster-versary!
So here's to our toaster... It's one year later and we're still really happy with our second ever toaster. In honor of the occasion, I baked up an awesome bread recipe from one of my favorite cookbooks:

Oatmeal Sandwich Bread from page 130 of Good To The Grain by Kim Boyce
Find the recipe adapted over at the Diary Of A Locavore blog ...or better yet, just go get the book from your local library or bookstore. It's a great introduction to baking with different grains and flours. I've baked up at least a half-dozen of the recipes so far and have loved every one.

My Notes: Just for the heck of it, I substituted Bob's Red Mill 5-Grain Rolled Hot Cereal for the oats. And since I didn't have any bread flour in the cupboard, I simply used 2 cups of all-purpose flour and added two tablespoons of gluten. The bread tasted—and toasted—great!

* This is all about compromising and it begins with respecting each other. It's a very grown-up thing to do and it helps build a happy marriage. Consider it my Marital Tip Of The Day. Cheers!

Friday, September 21, 2012

Freezer Jam Of The Golden Sun


Sweet, Sweet, Sunshine
Forget the moonbeams and butterflies, or catching falling stars that will fit in your pocket... that's just the stuff of sappy love songs. You can however, catch the summer sunshine and keep it in a jar. At least that's what this jam tastes like to me. Tomato sunshine.

Picture yourself in the middle of winter... it's cold, it's wet, the weather is miserable. You take a jar out of the freezer to thaw. You toast some rustic bread until it's crisp and golden, add some good flavorful cheese—maybe an aged cheddar or smoked Gouda—then pry off the lid of the jam jar and dollop this golden orange stuff over the top. You're transported. You suddenly remember the smell of your hands after picking tomatoes last August. You get a flashback of a warm ripe tomato bursting sweet in your mouth and forever defining the word "summer". It could happen. In fact, I'm planning on it.

Harvest Gold
I've got Sungold cherry tomatoes practically coming out of my ears right now, and while I love them, I know this gloriousness won't last much longer. So I'm "saving for a rainy day" the only way I can right now and capturing the very essence of summer sunshine in a jar for later. 

When I read this recipe, I just knew it would be amazing made with our Sungold cherry tomatoes. Some of them are so sweet, they stop tasting like tomatoes at all and say with assurance, "You see, we really ARE a fruit!". I made one batch at first just to try it out. I filled two half-pint jars, lidded them, labeled them, and stuck them in the freezer. With the bit that was left over, I dolloped it over toast with brie. Two or three times. The creamy pungency of the brie with the sweet, earthy tomato jam... my, oh my... oh my.

Sungold {Cherry Tomato} Freezer Jam
adapted from: The Vanilla Bean Blog
4 cups Sungold cherry tomatoes
1-1/4 cups sugar
a pinch of sea salt
  1. Wash the tomatoes and cut them in half.
  2. Put them in a heavy pot with the rest of the ingredients.
  3. Bring mixture to a boil then drop the heat down to a simmer.
  4. Cook the jam until thickened, 60-90 minutes, stirring frequently.
  5. Jam is done when you can swipe a finger across the back of your spoon and the path remains.
  6. Blend briefly with an immersion blender if you'd like a smoother texture.
  7. Let cool and transfer to jars.
  8. Refrigerate for up to two weeks, or freeze for 6 months.
Yield: 2 to 3 cups.
    Notes: Flavor is the name of the game here, so obviously you'll want to use only homegrown or farmer's market cherry tomatoes. This recipe doubles well. My first (single) batch made just over 2 cups. The next time I made it, I doubled the recipe and got just over 5 cups. Can't wait to try this on a grilled cheese sandwich, panini, cheeseburger... hmm, what else?

    Monday, September 17, 2012

    Refresh With Lemon Cucumbers

    Garden Fresh Lemon Cucumbers
    Thanks to a gift from a gardening friend last spring, our garden has been giving us lovely Lemon Cucumbers this summer and fall. I for one, couldn't be happier. Cucumbers have to be one of the most refreshing snacks ever. With their slight hint of citrus-ness, Lemon Cucumbers are even more so. 

    They've been really easy to grow; we have them in a pot with a bit of trellis propped in it. Keep them watered regularly, don't let the leaves get wet, guide their vines where you want them, and clip the cukes off as soon as they look ready. I've noticed that once cut from the vine, they start to lose their plump firmness, so plan on eating them within a day of picking.

    I usually just scrub them, slice off the ends, then cut them into quarters or slice them across like any other cucumber. We leave the skins on and eat them by themselves, or include them in a salad. Sometimes I'll drop a slice into my glass of ice water... super refreshing!

    Next year we're definitely getting another one of these vines... we might even have to get two of them!
    Happy growing!

    Wednesday, September 12, 2012

    From The South To My Mouth


    Classic Southern Pralines
    Have you ever had a real southern-style praline? You'd know it if you had. Buttery, rich, nutty and sweet, with a bit of snap and a touch of grit... sounds like the type of person I wouldn't mind being, actually.

    As some of the roots anchoring my family tree pass through southern soil, I find myself wondering if my affinity for pecans, ripe peaches, bourbon and bluegrass has been genetically gifted to me. My mother has always had a soft spot for things like pickled watermelon rind and pimiento cheese... is that a familial proclivity? I discovered grits (well, polenta actually, but close enough) a few years ago and it immediately became a staple at my house, both at breakfast and dinner. Could that be some latent awakening of my southern soul? I sometimes wonder about these things.

    Puddles Of Sweetness
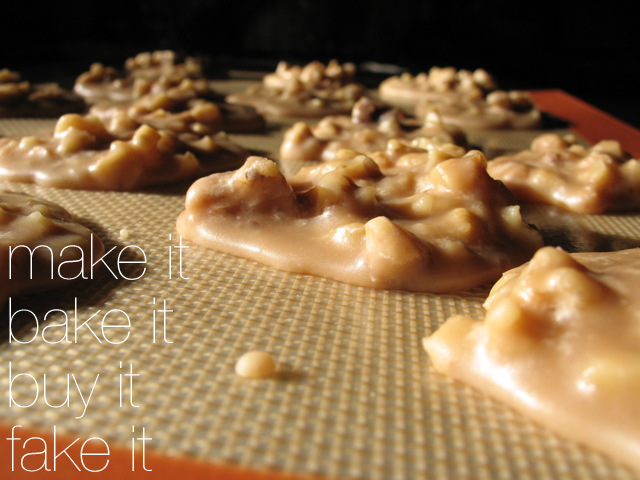
    As for pralines... when I was a child, my parents went to New Orleans on vacation and brought us back a box of pecan pralines. I'd never tasted anything like them. They became the high-point on my scale of confection perfection. I was officially obsessed. I even tried to make them once when I was a teenager... which led me to believe that pralines were not something you could make successfully at home.

    I came across some purely by chance at a restaurant in San Antonio once... and happily brought some home with me of course. But that was a dozen years ago. Everything is different now. I won't have to wait another decade or travel a couple thousand miles for my next one. Now I can make them whenever I want*, no matter where I am...

    The Lady Insisted
    When I first read this recipe for Classic Southern Pralines I was surprised by its simplicity. It looked almost... easy. So I bookmarked it and forgot about it. Well, my inner-southern "belle" started ringing in the back of my head and she just kept getting more and more insistent. So I gave in and gave it a go... my mother always told me, "When a lady insists, there is no further argument". I wonder if that's a southern-thing?

    You'll want to make some yourself... Classic Southern Pralines from The Kitchn

    Notes: I made these twice in two weeks. The first time I was a little too slow in realizing the point at which to stop stirring and start dropping. Nevertheless they were delicious enough to make again (in the interest of perfecting my skill, of course). The second batch turned out perfectly. It really comes down to observing and anticipating what's happening in the pot after you take it off the heat. That and having everything ready and set up beforehand. Like a roller-coaster ride, it doesn't take very long but there's no stopping once you've started! Once you've scooped out and dropped all the pralines, scrape the pan immediately with a metal spoon, don't wait. Save the scrapings to sprinkle over ice cream or fruit later.

    A Note About Nuts: I made these with walnuts instead of pecans. Not because I prefer them, and not as a nod to my northern home, but because they are cheaper. Period. And I toast them in a pan first. I think they taste even better that way.

    *Why this is an ever so slightly erroneous statement: I will most likely not make more of these until Christmas. I'd really better not. You see, I cannot be left alone in the house with them. I will eat them all. They really are that good. So while I can make these whenever I want...  really, I don't dare.

    Friday, September 7, 2012

    Lavender & Apricot Breakfast Rolls

    Lavender Apricot Breakfast Rolls
    From the recipe files: Made these the other day on a whim and we really liked them... they actually went together pretty fast too (no yeast!). The lavender in the dough is just right, not overpowering, and the apricot filling pairs with it perfectly. Looking a bit like cinnamon rolls but with a biscuit-y texture, they were especially tasty alongside a pot of vanilla scented black tea. 

    It's really starting to feel like Autumn around here and I'm finding myself wanting to bake more. In other words, I'll be making these again... and again...

    Lavender & Apricot Breakfast Rolls
    adapted from: Napa Valley Lavender Co.*

    Dough:
    2 1/4 cups flour
    1/2 cup sugar
    2 1/2 tsp baking powder
    1/2 tsp salt
    3
    Tblsp chilled butter
    2
    Tblsp fresh (or 1 Tblsp dried) lavender flowers, chopped 
    1/2 cup milk
    1 large egg, lightly beaten

    Filling:
    4 Tblsp apricot preserves
    2 Tbsp butter, softened
    4-5 chopped dried apricots

    2 tsp sugar

    Preheat oven to 375 degrees. Wipe the inside of an 8-inch round cake pan or a pie plate with butter or oil.

    Whisk together the flour, sugar, baking powder, and salt in a medium bowl. Cut the cold butter into small pieces (or use a grater if frozen) and work into the flour mixture using a pastry blender or your fingers, just until mixture resembles coarse meal. Stir in the lavender. Add the milk and egg, stirring only until combined. 

    Turn dough out onto a lightly floured surface. Gently but firmly pat the dough together, then knead it briefly until dough holds together. Dust the top with a little flour and roll into a 9 by 11 inch rectangle. 

    Mix apricot preserves and soft butter together. Warm for a few seconds in the microwave if it's too cold and not blending. Spread mixture over dough, leaving a 1/2 inch strip bare along one long side of the rectangle. Sprinkle the chopped apricots over the top. 

    Beginning with the opposite side, roll into a log. Pinch the seam along the length to seal. Cut the log into nine even slices. Place slices in the prepared pan, with one in the middle and the rest in a ring around it. Sprinkle sugar over the tops of the rolls. 

    Bake at 375°F for 30-35 minutes or until golden brown and a wooden toothpick inserted in center comes out clean. Turn the rolls out of the pan and onto a serving plate. Gently separate each one with a dinner knife and serve.

    Notes: I spread a little butter over the pan of rolls right after they came out of the oven  :^) Mmmm!

    * I've had 3 pages of printed out recipes from the Napa Valley Lavender Co. website kicking around in my copious recipe files for years... no idea how long. When I went to add their link to this recipe though, the website is no where to be found... apparently they are no longer around. The identical recipes are all over the web though and I have no idea where they actually originated... NVLCo. or somewhere else. Un petit mystery, n'est-ce pas?

    Sunday, September 2, 2012

    Strawberry Mint Lemonade

    {MakeitBakeitBuyitFakeit}

    Last time on As The Strawberry Turns we saw the husband make garden pallet-craft for his loving wife, even though he really really doesn't like pallet-crafting... we shared their hopes and dreams of a bounteous strawberry-filled summer... we saw 15 strawberry plants survive neglect and abuse at the hands of the sweet but forgetful couple... 

    By the start of September however, the girl was afraid that something was amiss. There were still no flowers, and thus no fruit, happening on these 15 remaining plants. It was then that she began to suspect that these "mid-to-late season" strawberries that they planted (and her dream of berry-ful bounty) might have to wait until next summer for fruition.

    The girl, not wanting to take any chances, went and did what any other girl might do in her position and she got herself to the nearest CostCo and bought a big bountiful bag of beautiful (but frozen) strawberries.

    The End... (at least until next summer anyway).

    Strawberry-Mint Lemonade

    5 cups water
    20 frozen strawberries (or fresh if you've got them)
    2 sprigs of fresh peppermint
    1/2 cup lemon juice
    6 Tblsp honey

    In a small pan, bring 3 cups of the water and the strawberries, to a boil. Remove from heat, add the mint, cover and let cool. Smash the strawberries in the pan, then strain through a sieve. Add the lemon juice, the honey, and the rest of the water. Mix well. Serve over ice.

    Notes: A lemonade that's "just right" for me may be too tart (or too sweet) for you. These things can always be adjusted though. Experiment with different amounts, different herbs, different sweeteners... on a hot day you can't go wrong as long as it's poured over lots of ice.

    Thursday, August 30, 2012

    Twig Tea (on the rocks)

    Twigs For Tea 
    Saving can be good: saving lives, saving money, saving endangered species, saving time, saving the document you've worked so hard on...

    But saving can also be bad: saving used staples, saving bellybutton lint, saving junk mail, saving every issue of Underwater Basket Weaving Weekly since 1967.

    I like to think that I fall somewhere in between. Although truth be told, I probably skew a bit further to the bad side of saving stuff (just short of the used staples and bellybutton lint). I can't help it... I like to wring every last drop of usefulness out a thing before throwing it out. Even if it's going to be composted.

    Save up and stock
    For instance, when I dry herbs from my garden and strip the leaves from the stems, the dried stems go into my "stock jar". When I use fresh herbs in my cooking, I save those stems too, letting them dry first, then I add them to the jar. The next time I make stock, I throw a big handful of those dry stems into the pot. They add depth and make my vegetable stock more flavorful.

    The sweeter side
    It's a good system and it works great for things like rosemary, oregano, and basil. But what about the "sweet herbs"; the lemon verbena, lavender, and the mints? Well, I save those stems separately in a big bowl on the counter and make Twig Tisane (herb tea) with them.

    Monday, August 27, 2012

    The Seven Year Stitch

    My Patchwork Baby Quilt
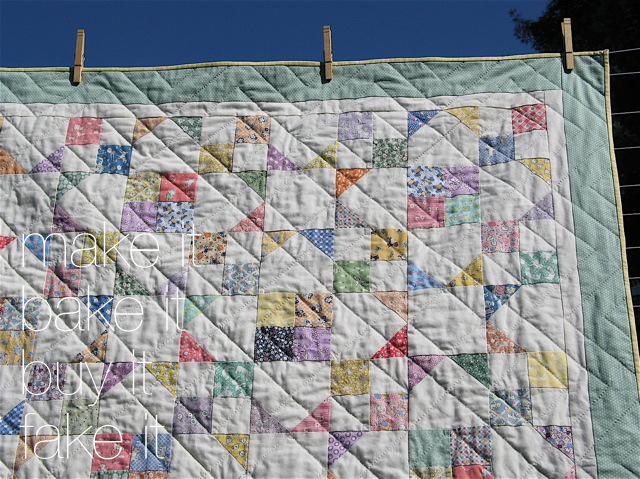
    See the quilt in the photo? Does it look familiar? Maybe it looks a little like my blog header up there? Well, there's a reason for that. They are the same quilt, just at different stages of completion. Like a magazine tear-out of a swimsuit model taped on the fridge (horrid thought) might remind someone about their goal of getting in shape for summer, I very cleverly used a photo of my unfinished quilt project for my blog banner. I see it nearly everyday. So, I am constantly being reminded of something I haven't finished. Is that sick or what?

    The Phenomenon Of Disappearing Motivation
    Anyway, let me just say that the strategy doesn't work. That scantily-clad stick-figure on the fridge will eventually become invisible... transparent. She will just cease to be noticed any more. And then it's July and well... there's always next summer, right? It's the same with my UFO* blog header. I stopped hearing it's motivational message. I simply stopped noticing it. 

    Recently, I made a renewed effort to complete the incomplete, finish the unfinished, wrap things up and move on to the next thing... whatever that may be. Sounds so healthy, right? Well it is... and it isn't. That baby quilt, for instance, is for my God-son...

    He just turned 7. 

    I started the quilt when he was 0.

    Tuesday, August 21, 2012

    Dr. Franken-Cilantro, I Presume?


    My Cilantro Bolted :(
    My cilantro bolted. Actually, it is currently bolting. What does it even mean, to bolt? It sounds like something in Dr. Frankenstein's notes: 
    ...don't forget bolting: Add contact points to monster [sides of neck?] for attachment of jumper cables; crucial for next phase in reanimation of creature. Bwah-ha-ha-hah!
    "It's Ali---ive!!!"
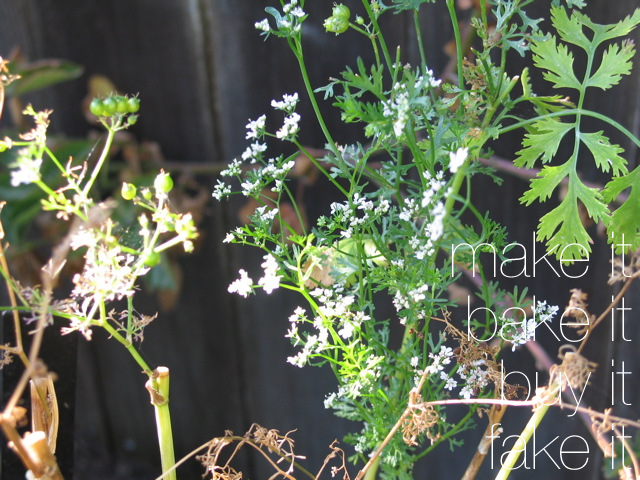
    In this instance however, it describes what happens to cilantro plants when their roots notice that the soil has reached 70°F. If you've ever had your cilantro bolt on you, you'll know what I'm talking about. If not, I'll let you in on what happens at that magical 70°F point... the plant decides that the time is right for making seeds, shoots up with a staggering amount of growth, bursts into pretty little blossoms, followed by round green seed pods.

    It happens fast. It happens dramatically. You're happily snipping some cilantro here, some there. A salad dressing one week, maybe a marinade or quesadillas the next, and then...BAM! By the time you realize what's happened... it's too late to warn the villagers.

    So... I guess the whole creating-a-monster analogy actually does apply here after all.

    Thursday, August 16, 2012

    Vertically Challenged: A Love Story

    Vertical Pallet Planter for Strawberries
    This is a story about a girl who loved strawberries. This girl grew strawberries in a pot on her patio one summer and having had such a lovely time of it, decided she wanted to grow eighty-seven times as many strawberry plants the following year. 

    Well, as these types of stories go, the girl, who spent way too much time on Pinterest, had a very handsome and handy husband. This husband built the girl a strawberry planter like the one she had Pinned on her gardening ideas board, but better.*

    He then bought her bags of strawberry rhizomes. It was late winter.

    They waited, the hubby and the girl, until fairer weather in which to plant those dormant roots. But the busy-ness of their life interrupted their plans and possibly they also forgot where they put the bags of rhizomes for a while. 

    Suddenly they realized that it was past planting time! They found themselves behind schedule! Because of their negligence, sadly, a few of the plant-lets didn't make it. But the rest of them (Praise be!), grew up and seemed very very happy...

    Stay tuned for the exciting next installment of As The Strawberry Turns!

    The Strawberries Of Our Lives?... 

    All My Strawberries?...

    General Strawberry?

    Oh, now that's just plain silly.


    *This is a completely subjective statement and in no way is intended to diminish the total awesomeness of the source idea. The "improvements" he made included adding wood scraps to the sides and bottom of the pallet and a scrap piece of plywood to the back of it. It's way stronger and more durable than the original design... but also much heavier too. If you go that route, you'll need to have a couple of strong and obliging guys around (never a bad idea anyway) when it's time to raise the planter into place. He also painted it dark brown because he's totally not into pallet-crafts, and all things considered, I didn't object. After all, it can't help but draw the eye when we're on the patio, and it might as well not look like something we found in an alley and nailed wood scraps onto... not at first glance anyhow!

    Tuesday, August 14, 2012

    Mea Culpa, Pituophis Catenifer

    ...so sorry little garden snakeI was going to write about basil yesterday... or cilantro... or maybe strawberries. I hadn't decided, but as you can see, fate intervened...

    After breakfast, I'd wanted to putter a bit amongst the herbs on the back patio before it got too hot. As soon as I stepped outside though, I saw a distinctive shape behind the lounge chair. Retreating behind the the safety of the sliding-glass door I saw that it was indeed a snake. I ran for Hubs who came over and assured me it was a gopher snake, "They're good snakes—they eat gophers."

    There was one hitch... the poor little dear was caught in the plastic netting we'd had over the blueberry shrubs all summer. The plastic netting I took off of the blueberries two weeks ago and hadn't put away yet. My bad. My really bad.

    Thursday, August 9, 2012

    The State Of My Tomatoes (2012)

    Garden Tomatoes 2012: "Cosmonauts"
    It's time for my annual "state-of-the-tomato address". Actually, I don't remember if I did this last year or not. I do know that I've talked about my love of homegrown tomatoes before, and that has not changed. If anything, that love just grows deeper with each passing year.

    Now, while I can't imagine that anyone else could be all that interested in how our plants are doing, at the very least you can learn from our mistakes and do better in your own garden or patio. And let me tell you, we made a couple of doozies this year!

    New this year:
    • All tomato growing has been shifted to the front yard. If you want tomatoes, you must plant where the sun is. And we want tomatoes.
    • Hubby built a two-tiered raised planter to one side of the driveway near the street. The lower tier was planted with basil, the upper, home to two tomatoes with a row of chives in front of them.
    • We rigged up a shepherd's hook in the top tier of the planter to hang one of those upside-down hanging planter-thingies as seen on...
    What we planted and how they're doing:
    • Black Krim (in half-barrel)... We got a half-dozen that ripened a couple weeks ago. The rest are still green and quite small. Growth has slowed.
    • Cosmonaut Volkov (in ground)... Topped out at around 8-feet and set large fruit like crazy. A few weeks ago the top started withering and dying back. When we checked the ripest fruits last week, they were soft though not yet red. We picked them and they were a mushy and the flavor was lacking.
    • Lemon Boy (in raised planter)... After a slow start, grew vigorously and set lots of fruit. We discovered blossom-end rot on half a dozen of the fruits last week and a few more this week.
    • Sungold (in raised planter)... What can I say that I haven't said before about this flavorful and amazing tomato? The shrub is absolutely huge and completely covered in clusters of cherry tomatoes on the verge of inundation... same as always.
    • Black Prince (in hanging contraption)... This one was a last minute addition. Is growing pretty well and has some fruit set but so far doesn't look like a big producer.

    Friday, August 3, 2012

    A Potato Salad Summer

    Summer Garden Potato Salad
    When I promised to bring the potato salad for a BBQ we were invited to last month, I forgot that my usual go-to recipe called for red-skinned spuds and all we had were russets. Oops. So off I went to look online for another recipe, because I just love making something for the first time at the last minute... don't you? (that was just the tiniest bit of sarcasm)

    Martha Stewart came through (as she so often does) with a delicious and oh-so-beautiful potato salad recipe featuring good old russet potatoes. So colorful, it's worthy of the most festive of picnics and other summer events. It's practically a party all by itself. I was entirely pleased with how it came out, which is, of course, a good thing. So I made it again last weekend for our church picnic... as far as recipes go, it's definitely a keeper.

    Festive, delicious, and easy to put together, this potato salad is both familiar and a little special at the same time...

    Summer Garden Potato Salad  
    adapted from Martha Stewart Living magazine (June 2000) and The Martha Stewart Living Cookbook (page 226)

    3 large eggs, hard-boiled and chopped
    8-9 russet potatoes
    3 T apple cider vinegar
    1 cup mayonnaise
    1 tsp dry mustard
    kosher salt & black pepper
    1/4 cup finely chopped chives
    2 Tblsp chopped fresh parsley
    3 stalks of celery, diced
    2 carrots, shredded
    1 red bell pepper, diced
    1 red onion, diced

    Hard-boil your eggs first...
    Place the eggs in the bottom of a pan and fill with cool water, covering by 1/2 to 1-inch. Bring to a boil, remove pan from heat, cover and let sit for 12 minutes. Carefully transfer eggs to a bowl of cold water to stop them cooking further. When eggs are completely cooled, tap them all over against the side of the sink and peel under cool running water. Keep in the fridge until ready to use.

    Cook the potatoes...
    Scrub the potatoes and place in a large pot. Cover with at least 2-inches of water and bring to a boil. Add a tablespoon of salt and turn the heat down. Simmer for about 25 minutes, or until a paring knife slides easily to the center. Drain the potatoes and very carefully remove the skins with the paring knife, protecting your hands with gloves or towels. Cut the potatoes into 1-inch cubes, place into a bowl and sprinkle the vinegar over them.

    Make the dressing...
    Chop the hard-boiled eggs and add them to a large bowl along with the mayonnaise, mustard, 2 tsp of salt, and 1 tsp black pepper. Whisk together. Add the potatoes, herbs and vegetables, stirring well to distribute everything. Taste it and add more seasoning if needed. The flavors will benefit from some time together in the fridge, so try to make this the day before you want to serve it. Serves 10-12.

    My Notes: I initially chose this recipe because it used russets (which I had a lot of) instead of red-skinned (which I had none of). But what was unexpected was how great it was to use some things from my garden and also how much better it tasted because of the homemade mayo.  If you have the few minutes it takes to quickly make up a batch of mayo, I truly think the potato salad tastes better for it.

    Wednesday, August 1, 2012

    Simply Simpler Simple Syrup

    Simply Simpler Simple Syrup
    I kind of love recipes that are expressed as ratios; where any unit of measure will work regardless of whether you use metric, Imperial, or an old chipped teacup. You know: one part of this to three parts of that, where the "part" can be anything from a thimble to a 5-gallon drum. Super simple.

    Well, the other day I needed to make a small amount of simple syrup for a batch of iced tea I was making. The classic simple syrup recipe is 1:1 (one part sugar to one part water, boiled together and cooled). Couldn't be simpler... or could it?

    It was HOT that day—the day I needed to make my liquid sweetener. I did not want to turn on the stove for anything. Not even 10 minutes. Besides, I really didn't need a lot of it; hardly worth dirtying a saucepan for. And that's when it hit me... when I feed my water kefir grains, I just add the sugar to the water and swirl the heck out of it for a few seconds until it dissolves. No heat required... Hello!

    I quickly tossed a half-cup of sugar and a half-cup of water into a pint Mason jar, then I capped it and shook it like I meant it. It took about 2-3 minutes of shimmying, but the result was a jar of liquid sweetener, ready to use.

    Monday, July 16, 2012

    Banana Split… In A Glass… For Breakfast

    I'll split it with you...
    It wasn't until taking the last few sips of my breakfast smoothie the other day that I realized just how much it reminded me of a banana split. Up until that point I just kept thinking, "This tastes gooooood! Maybe too good for something that's supposed to be breakfast?… Nah!"

    Just like a real banana split it's got dairy, bananas, strawberries, vanilla, and chocolate (yum!). The only things missing are the whipped cream, sprinkles, and a cherry on top. Oh yeah... and the "I-can't-believe-I-ate-all-that" guilt. There's not a lick of that.

    Unlike a bona fide banana split, this is packed with pro-biotics, leafy greens, and wheat germ. But you'd sure never know it from the taste....

    Thursday, July 12, 2012

    Savoring The Simple Gifts Of Summer


    mid-summer supper

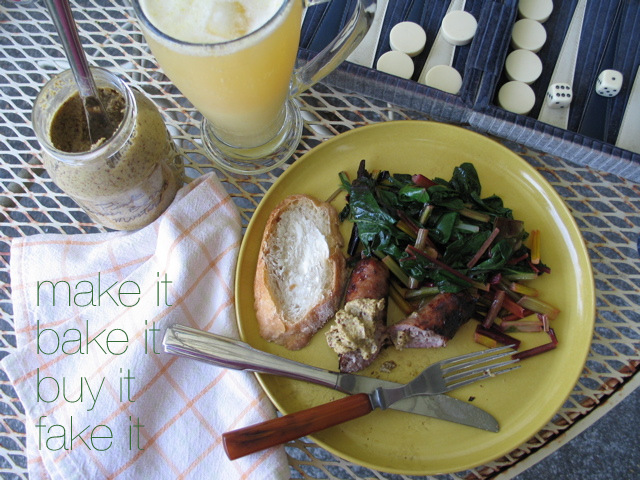
    I didn't plan on taking a photo of my dinner last night. I didn't plan on blogging about it today. I didn't plan the meal at all. Sure, I knew we'd be having leftover bratwurst with mustard, but beyond that, it all just fell together, and when I sat down and started to dig into it... my senses took everything in and I had to grab the camera.

    What you don't see in the photo is the color of the summer evening sky. You can't feel the perfectly soft warmth paired with the gentlest of breezes in such contrast with the scorching heat earlier in the day. You might get a hint of the relaxed ease of the meal, but what about the thrift? What about the sense of accomplishment, stewardship, gratitude, and relief? And, of course, there's the deliciousness to consider as well. A picture may be worth a thousand words, but how many can you really see? To anyone else, it's just a plate of food, but to me it represents so much more...

    Monday, July 2, 2012

    Putting The Corn in Corningware

    Pleasant Under Glass
    Have you seen the "Easiest Way To Cook Corn"? It's from Cait Hates Cake and is all over Pinterest (which is where it caught my eye). I wasn't even looking for a new method for cooking corn... we always just grill them on the Weber alongside the rest of the meal. They're pretty darned awesome that way, but a bit of work to remove the silk while leaving the husks on and then re-wrapping. And that was precisely what intrigued me about this oven method... the simplicity. The corncobs cook whole and un-shucked, and  separate easily from both husk and silk when they're done... oh yeah, and they're cooked to perfection.

    Thursday, June 28, 2012

    How Smoothies Are Like Marinades (and how I am like Rocky Balboa)

    I tend to not use recipes when I make things like smoothies or marinades. I might use a recipe as a guide, but more often than not, I just don't bother. Instead, I use a formula... really it's almost more of a rhyme or mnemonic. Breaking the finished product down into it's basic elements makes for a super-flexible and creative approach. As a result, my smoothies and marinades all tend to be of the "everything-but-the-kitchen sink" variety: always tasty, occasionally spectacular. If I hit on a particular combination that knocks it out of the park... I write it down in a messy notebook (or on this blog) for the next time. Here's my approach to smoothie making...

    Wednesday, June 6, 2012

    Eating Like A Bird

    Millet Muffins with Blueberries
    Everyone used to tell me when I was a young'un that I "ate like a bird". I always thought they were referring to how little I ate. Now that we have a bird-feeder in the front yard and can see just how much birds actually consume… I'm wondering what everyone was thinking! Watching the way they plunder our bird feeder, I can only come to the conclusion that birds eat like pigs. Little itty bitty piggies... with feathers.

    The "eating like a bird" reference perhaps then had to do with how I ate, not how much. As a child, I used to pick (peck?) at my food. Maybe that's where the similarity with bird-like table manners comes into play. I also ate really slowly. Birds are not exactly known for eating slowly though, come to think of it. Constantly, sometimes messily, noisily and amusingly... sure, but never slowly. So perhaps I never actually "ate like a bird" at all.

    Of course, there's another way to eat like a bird, and that's to eat what birds eat. The other day I made some Millet Muffins, tossing a big handful of blueberries in the batter at the last minute. The first time I'd made these, my Hubby said, "Millet? Isn't that bird seed?". Well, it is... and it isn't. You'll want to buy your own millet from the baking/grains aisle (and not from the pet store), but it is essentially the same grain. When added to baked goods, millet brings a lovely bit of texture, pop, and crunch to the finished treat.

    Wednesday, May 30, 2012

    Budget Pets & Sensory Gardens

    Pets are a big responsibility... and one I can't in good conscience commit to right now. They require stability, time, space, and money. We're a little thin in some of those spots at the moment, but we still feel the emptiness that only pets can fill. We have a pet-sized hole in our lives.* So in the meantime, we have birds. Or more specifically, we feed birds. Wild birds to be exact... lots and lots of them.

    Raise your hand if you get teary during the "Feed The Birds" montage in Mary Poppins...
    While our fine feathered friends seem to eat their weight in food every day, a big sack of seed every couple of months is still cheaper than vet bills and designer doggy duds. Plus, they're the easiest pets ever (not even goldfish are this easy). Admittedly, as far as pets go, wild birds score pretty low on the snuggle-factor, but they rate very high on the amusement scale.

    A Sound Garden
    All of our bird visitors, large and small, have made our garden come alive with movement and activity... the kind you just can't get with whirligigs and weather-vanes. I tend to think that good landscaping should incorporate movement and sound, and indeed engage all our other basic senses as well. Like movement, sound is an element that often gets forgotten, but a yard that's atwitter with birdies, is a garden complete. Just hearing them out there chirping and chattering away makes me happy. I call that "cheep" therapy. Want to get in on all the action? Here are some tips that have worked for us...

    Wednesday, May 23, 2012

    Love Is A Many Blendered Thing

    Herb garden in a glass!
    I've been wanting to try making a green smoothie for a while, but never seem to have any extra greens sitting around. What I do have are a lot of herbs in my garden… they're green, do they count? I even have beet greens... although the variety we planted are ruby red, I think they'll do.

    Wandering through my front and back yards, I clipped a bit of this, snipped off a bit of that until I had a big handful of "greens"...
     
    Also intriguing me has been the idea of the whole-citrus vinaigrette. I just love the idea of pulverizing and consuming the whole fruit. Maybe I'm just excited about not having to slice, squeeze, zest, or otherwise fuss with it. It is simplicity and laziness together at their beautiful best. Why not try it in a smoothie?

    I picked a small ripe lemon from our dwarf Meyer tree on the back patio and headed into the kitchen...

    The smoothie I created is entirely experimental and admittedly, a little bizarre. I basically shopped from my garden and my freezer with a "let's see what happens" attitude. What happened was a surprising combination of flavors and a smoothie like no other. It's very lemon-forward due to the whole lemon of course, but also to all the lemon-scented herbs I used. Each one lemony, but in slightly different ways.

    I've included the recipe here, not because I think anyone else would want to recreate it, so much as to show just how completely crazy you can get when making smoothies, and still end up with something really tasty....

    Friday, May 18, 2012

    Tales From A Nostalgia Trip (and some time travel tips)

    http://makeitbakeitbuyitfakeit.blogspot.com/
    I was away for a couple of weeks...  far and away...  far, far, away.  I was on a trip back in time to a place where pieces of my childhood have remained packed away and undisturbed:
    ...Jacks and super-balls in their little cotton drawstring bag. 

    ...Barbie asleep in her iconic pink wardrobe carrying case. 

    ...Tutus, tights, and toe shoes. 

    ...Cleats and shin-guards still in their duffel bag ready for the next scrimmage. 

    ...Prom dresses hanging in the closet as if waiting for the next dance.

    ...More Billy Idol posters than I even remember having.
    I went through the portal—the rip in space-time that allowed me to travel back there for a little while. Time seems to have stopped after I moved away... leaving behind a closet full of who I used to be. But time doesn't ever really stop. While my childhood home may be somewhat Brigadoon-ish, my hometown had moved on. It's now bustling, over-crowded, and congested... anxious and claustrophobic. The reality of the place no longer resembles what I so fondly remember. There really is no place like home.

    So, I was away... but I'm back now.
    And yes, I brought some of my toys with me.

    Handy tips for smooth trips
    Should you find yourself doing some time traveling by air in the near future here are some tips I gleaned from my recent little adventure:

    Friday, April 27, 2012

    Hello! My Name Is... Herb

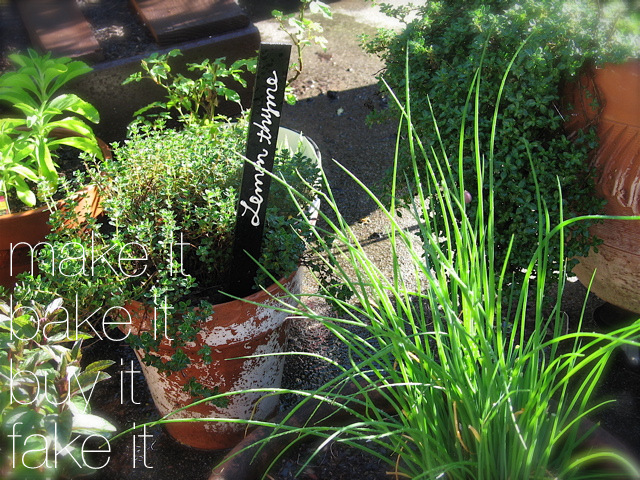
    DIY Faux-Chalkboard Plant Markers
    The great thing about chalkboards is that you can wipe them clean and start over whenever you want… I love that. I have two chalkboards in my kitchen that I use all the time. The one my Hubby and I made when we moved in here is one of my very favorite things. Both boards sport to-do lists, groceries needed, etc. on any given day of the year. Super handy.

    Here today, gone before you know it
    Needless to say, I love the look of chalkboard-craftiness as much as the next person, but practicality prevents me from using it for labeling my mason jars or identifying my herbs in the garden or any other alternative use where it's particular type of temporality (temporariness?) is not really a benefit. In other words, anywhere the writing is likely to get smudged off prematurely.

    I need some cilantro... stat!
    However, spring has finally sprung and I need to know my cilantro from my parsley at a glance (and Hubs needs to know too, as I often find myself in the middle of cooking and need him to snip some herbs for me). Mind you, we normally can tell the difference between our plants, but we've added a lot of new herbs this year… and well... plant markers are cute. There. I've said it.

    Saturday, April 21, 2012

    Herb-y Eggs with Easy Freezer Hash Browns

    Herb-y Eggs & Easy Freezer Hash Browns
    I am not a morning person. I get up early, but let's just say I'm not exactly chipper and cheerful about it. Not right away anyhow. A little time, a little quiet, and a little caffeine... ease into it, you know? So I really don't want to have to think too much about cooking breakfast every morning.

    But....... I also want a good breakfast. Steel-cut oats, granola, egg quesadillas, muffinssmoothies, banana bread, pancakes, scones, yogurt with fruit... I even like breakfast for dinner (I could go on and on). Are you getting the idea that I like breakfast? A lot? And I love hash browns too, but with all the shredding and squeezing, they're too much effort for a regular weekday breakfast. Until now.

    Thanks to this method that a friend clued me into, we've been having truck-stop-worthy hash browns whenever we want. They go straight from freezer to frying pan. No fuss, no muss, and no early morning exertion... practically no brain function necessary at all!

    Wednesday, April 18, 2012

    Gee, Your Hair Smells Lavender-ific

    Lavender Curl Refreshing Spray
    Anyone who has known me for any length of time, knows that I have a love/hate thing going on with my curly head of hair. It's true. Sometimes the pendulum swings slowly and sometimes I'll flip from love to hate overnight. Most of the time though, I'm wallowing in an all-out "I-hate-my-hair" pit of despair. Naturally curly hair can do that to a person.

    Over the years I'd try almost anything if it promised better hair. It's been my constant quest. My grail. My impossible dream. I've permed it, straightened it, and otherwise tortured it. I've even chopped it all off in frustration. Just about any product that was marketed "for curly hair", I'd buy. Nothing worked.

    A few months ago I bought Curly Girl: The Handbook.* It has changed everything. Above and beyond all the stories, the method, the tips and tricks... the big message was this: You are not alone... and it's never too late to learn how to take care of your curls. Bam.

    Wednesday, April 11, 2012

    A Penny For Your Thoughts… A Dollar For Your Age

    My Mom started a birthday tradition in our family of giving us kids a dollar for every year we were old. Six years old… six dollars. Seventeen years old… 17 bucks. Thirty-Nine years old… 39 smackers. It wasn't our main gift, more of a token really than anything. We always had a bit of a laugh over it, but it's one of those sweet little things that we always look forward to and remember fondly.  

    Another year, another dollar
    Nowadays it comes in the form of a check, but when we were younger, Mom would get creative and do things like use all quarters and tape them together into a long garland. Fun stuff like that. If Mom had known about "money-gami" or "dollar-gami" (origami with dollar bills), she would have totally gotten into it. I have recently mastered the "Shirt & Tie" fold which is on the um... simpler end of the difficulty range. In other words, it's completely do-able.

    If it doesn't fit, they can always ex-change it
    So next time you forget to buy a gift for someone, or can't figure out what to get them and think that giving money is the best idea (it could happen)… do something creative with it like fold it into a shirt, or a ring, a butterfly… or even a viking helmet. It gives a whole new meaning to the term "folding money"!
    • I found the easy to follow "Shirt & Tie" instructions here.
    • There are even more amazing dollar folding ideas here.
    Notes: If you have the time, ironing your bills (no steam!) before folding helps to crisp them up and the finished product will look that much better. A bone-folder is great for getting sharp folds, but the side of a pen or butter-knife will work also.

    Wednesday, April 4, 2012

    Five Out Of Five Soda Bread

    Rosemary and Browned Butter Soda Bread
    I have to say right here, right now, that I've never personally made a soda bread that I liked. Never. Maybe I just like stuff that I don't have to make myself? That's a distinct possibility. After all, I like the soda bread that friends and family have made. But when I make it myself, it just doesn't happen for me. Ever.

    Until now. This soda bread I like... in fact, this soda bread I love. I've only made it three times, but the recipe makes two loaves and we gave one away, so we've eaten five loaves of it (so far). Five out of five. We've had it by itself as a snack, alongside bowls of soup, and with mugs of strong black tea for breakfast (my favorite). I very nearly ate an entire loaf myself. It's that good.

    The combination of flavors in this quick bread blur the line between savory and sweet… the caramel-y rich browned butter, sweet/hot freshly ground black pepper, piney/herbal fresh rosemary, a little saltiness from the baking soda, and some earthy sweetness from the honey... I'm making myself hungry.

    Tuesday, March 27, 2012

    Big Dippers

    Whole Wheat Chocolate Chip Cookies
    These chocolate chip cookies are unlike any other I've ever baked… and that's saying something. Chocolate Chip Cookies are my all-time bar-none go-to cookie... and I love trying out different varieties of them. This one is unique because it uses all whole wheat flour… yep, 100% whole wheat flour. That in itself is quite a feat, but these cookies are also tasty. Really tasty. In fact, oddly enough, they remind me of store bought cookies. The kind that can sit in their package on the store shelf for two years and not go bad… except these would totally go bad because there's no preservatives or hydrogenated fats in them. Yea!

    Whole Wheat Chocolate Chip Cookies 
    from Kim Boyce's cookbook: Good To The Grain (page 41)

    Some things to know about these cookies:
    • They have quite a different texture to them: fairly dense and almost sandy.
    • They are very sturdy cookies. Nothing dainty or delicate about them.
    • Perfect for dunking in milk. Or packing on a picnic. Or sending in a care package.
    • If you love chocolate, go ahead and add more chocolate chips/chunks. Trust me.
    • They keep well if stored in an airtight container.
    • If you freeze the dough balls and bake them later, they won't spread out as much (resulting in a thicker cookie), and in my opinion, are not as good as the ones baked fresh. 


    Monday, March 12, 2012

    Keeping The Colony Happy


    Making Water Kefir Soda
    In addition to my oft-neglected sourdough starter ("Edwina"), I have for the past six months been caring for and benefiting from, a different kind of bacterial colony... Water Kefir Grains. Never heard of 'em? Don't worry, I hadn't either. But now (thanks to this gracious lady), I am involved in a mutually beneficial relationship with what amounts to a science experiment. You see, I feel responsible for the well-being of my colony, like I would with a bowl of goldfish. But in a way that goldfish never could, my little colony is responsible for my well-being too. Intrigued  yet?

    More fun than a barrel of Sea Monkeys
    There is so much info on the web about water kefir that I won't spend time or space here reiterating it. I will however link to some info at the end in case you're still curious and want to read more about it. In a nutshell, water kefir is a type of SCOBY... a Symbiotic Culture Of Bacteria and Yeast. Now before you get scared off... just think "probiotics". You know, the good/friendly/beneficial bacteria that are so good for your gut and immune system. That's what water kefir is: pure probiotic goodness.

    I see so many products trumpeting "Now With Probiotics!!" on the packaging, not to mention the probiotic supplements that you can buy (I shudder to think of what they would cost to take regularly). The beauty of these little water-babies is that you only have to buy them once. That's it! Feed them and care for them and not only can they be used over and over again, but if conditions are favorable, they just may even multiply so you can share them with friends.

    Wednesday, February 22, 2012

    The Lifecyle Of A Favorite Sweater (part 1)

    DIY Wool Insoles For Toasty Toes
    Let's talk about clothes... and high school... and letting go of stuff... just for a bit.

    Back in high-school, the only mainstream retail line of clothing that I remotely cared about, the only one that I sought out, the one I'd save up my allowance for... was Esprit. There was something so appealing in their fun fresh euro-chic look back then. I only had a few pieces, but I'd chosen them with care and I wore the heck out of them. Highlights of my collection included: a black lambswool sweater vest, a cute pair of white penny-loafer-type flats, a black and white polka dot pleated skirt... and a charcoal grey ribbed wool crew-neck sweater.

    Esprit De Clutter
    I kept that charcoal grey sweater long after it stopped fitting me and even after the moths had invited their friends over for lunch. I don't know why, but I just couldn't let it go. To look at it was to remember. It's dark neutrality transitioned easily between all my styles and it's simple shape transcended all trends... a true classic. Did I mention how soft and comforting it was? Just like a hug. If you had come back in time and told me that when I grew up I would intentionally shrink and cut up that sweater and then stuff it in my shoes, well, I would have totally called you a dweeb. I'm so sure.

    What you see up there in the upper-left side of the photo are indeed the former sleeves of that very same sweater from my past. I figured that if it was going to take up space in my home, and could no longer be worn... maybe it could be put to use in some other way. The first thing I did (to stop the moth picnic), was to felt it. That's a verb. It means "to make felt". It's really hard to do: you run a 100% wool knit garment through the washing machine with soap and hot water and follow that with a tumble in a hot dryer. Ta-da! Wool felt. Thick and soft, and if you cut into it, it won't ravel. Gorgeous stuff.

    Thursday, February 9, 2012

    Kissing The Cook

    Lavender Honey Lip Balm
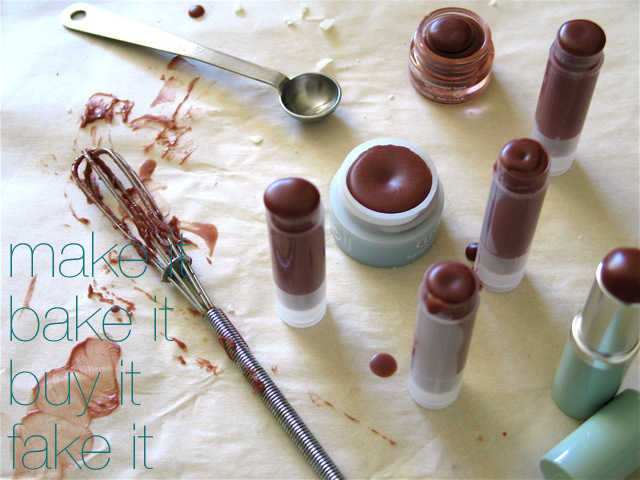
    Hey good lookin', what'cha got cookin'? Making your own natural lip balms at home kind of blurs the line between cooking and crafting. Think about it: They're made with good-for-you edible ingredients like honey and olive oil, and they're cooked up right there in your own kitchen... only you don't eat them. Well actually, I've seen plenty of stats over the years about how much lipstick and lip gloss the average woman ingests over her lifetime (eek!). All the more reason to know what it's made from, eh?

    The post that inspired all this kitchen-lab cosmetic cookery features three different lip balm recipes, each one yummier than the next. Normally I'd have had a really hard time choosing, but I only had all the ingredients on hand for one of them: Luscious Lavender Lip Balm. It didn't hurt any that I'm a sucker for anything with lavender (or alliteration) in it, so Luscious Lavender Lip Balm it was... did I mention that it has cocoa powder and honey in it too? Lavender-Cocoa-Honey-liciousness... it really is good enough to eat (but it probably works better as a lip balm).